WorkSkiRV Winter Waste Guide: Black & Gray Tank Habits That Don’t Suck
- Dean Machine

- Jan 28
- 4 min read
When you live and ride out of the rig all winter, managing black and gray tanks becomes as important as picking the right wax. This guide covers best practices for winter camping with full hookups, boondocking in the backcountry, and dumping on travel days—where Love’s gets the nod whenever possible.
Winter At Camp With Utilities
When you’ve scored a winter site with full hookups, use that luxury to keep tanks healthy and odor‑free.
Setup and general rules
Use a quality sewer hose with a good seal at both ends, plus a clear elbow so you can see what’s happening. Dump black first, then gray to rinse the hose.
In freezing weather, keep your sewer hose disconnected and capped most of the time; only hook up to dump, then stow it so it doesn’t freeze solid.
Keep tank heaters on (if equipped) or use skirting/insulation to help tanks and valves stay above freezing.
Black tank routine (hookups)
Leave the black valve closed so waste and liquids stay together and break down; only dump when at least 2/3 full to get a strong flush.
After dumping, add several gallons of water plus tank treatment through the toilet so solids don’t pyramid on a dry floor.
Gray tank routine (hookups)
You can leave gray closed and dump periodically, or cracked open if you have heavy shower use—just avoid letting a constant trickle freeze in the hose or fittings.
Use strainers in sinks and wipe greasy pans with a paper towel before washing so food and fats don’t build up in the gray tank.
Winter Boondocking / Backcountry (No Hookups)
Off‑grid in winter, water and tank capacity are your limiting factors. Stretch both.
Before you head out
Dump both black and gray tanks and fully refill fresh water right before you leave pavement.
Add tank treatment and a starter charge of water to the black tank so it’s ready to break things down from day one.
Black tank tactics off‑grid
Use minimal water for flushing—just enough to move solids, and skip extra flushes for #1.
Use rapid‑dissolving RV/“septic safe” toilet paper; consider trashing some TP instead of sending it all to the tank to extend time between dumps.
In very low temps, occasionally pour a few liters of warm (not boiling) water down the toilet to keep things moving toward the outlet and away from freezing at the gate valve.
Gray tank tactics off‑grid
Take “navy showers”: water on to wet, off to soap, on to rinse; consider using a basin in the sink and tossing dishwater if you’re really tight on capacity.
Biodegradable soap still needs to go into a proper dump station; don’t drain gray into the woods unless local rules explicitly allow it.
Extending time between dumps
For long backcountry stints, consider:
A portable waste tote or bladder and macerator pump so you can shuttle waste to a distant dump without moving the rig.
Strict “liquids in the toilet, solids + TP only when necessary” rules, or even separate pee bottle / emergency bag setups if you’re really remote.
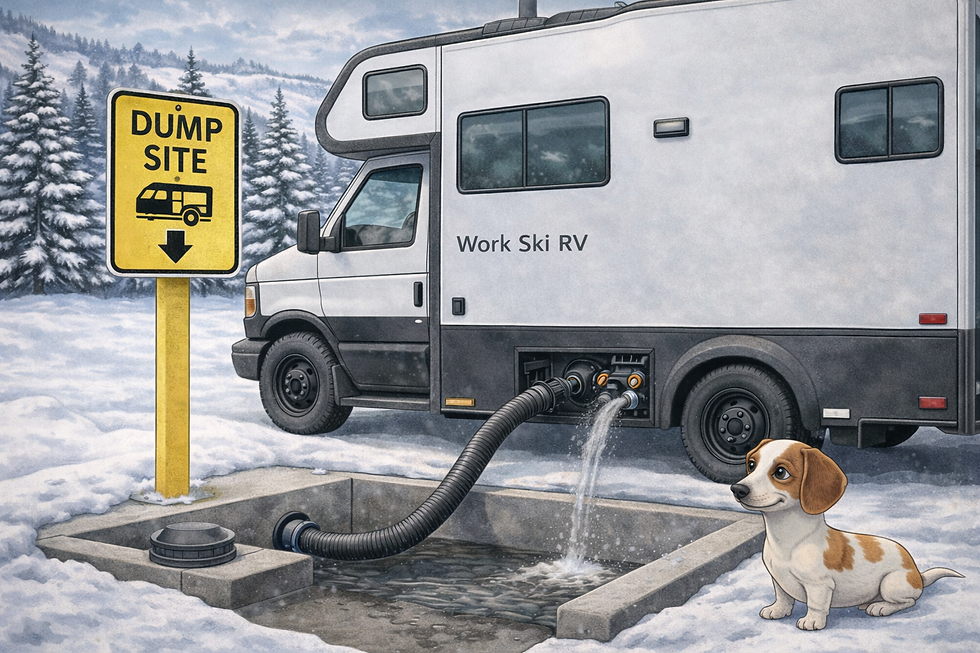
Beverly Black & Gray Tank Emptying Process (Step‑By‑Step)
Here’s a clean, repeatable sequence for your rig “Beverly” whether you’re at a resort, dump station, or RV park.
Prep the station
Park as close as practical to the dump inlet, set parking brake, and put on gloves.
Attach your sewer hose to the RV outlet and secure the other end in the dump port with a good seal.
Black tank first
Open the black valve fully and let it drain until the flow stops.
If you have a built‑in flush, connect a dedicated non‑potable hose and run a few rinse cycles until the water runs mostly clear.
No flush system? Use a wand or send one or two buckets of clean water down the toilet to push solids out.
Gray tank second
Close the black valve, then open the gray valve to rinse the hose with soapy sink/shower water.
When flow stops, you can briefly run a sink or shower to push a final bit of warm water through for a better rinse.
Final rinse and stow
Use the dump‑station rinse hose (never your fresh‑water hose) to rinse the outside and inside of the sewer hose while the outlet end is still in the dump port.
Disconnect the hose, cap your RV outlet, and stow hose and fittings in a dedicated “sewer bin” so they never share space with fresh‑water gear.
Recharge the tanks
Back in the rig, put several gallons of water plus tank treatment into the black tank so Beverly is ready for the next leg.
While Traveling: Dumping Between Mountains
On travel days between resorts or zones, aim to roll with empty tanks and full fresh water so you’re always ready to boondock.
Love’s as the preferred travel‑day dump
Many Love’s locations now have dedicated RV sites or dump stations with good lighting, water, and easy access, and some offer hookups and propane as well.
Use the Love’s app or website to confirm a dump station at your destination location; amenities vary by stop.
Other options on the road
Some state rest areas, municipal parks, and visitor centers offer RV dump stations—often signed on the highway or listed in apps/guidebooks.
Many RV parks or campgrounds will sell a dump‑only visit even if you aren’t staying overnight; call ahead and expect a small fee.
Travel‑day habits
Try to dump near the end of a drive so you arrive at the next camp light on weight and heavy on capacity.
Keep a dedicated “sewer kit” bin easily accessible in an outside bay so you’re not digging through snowboard gear at a busy dump station.
In freezing temps, favor dumps during the warmer part of the day so valves and hoses move more freely.
WorkSkiRV Takeaway
If you treat Beverly’s black and gray tanks like critical backcountry gear—planned, maintained, and used intentionally—you’ll spend less time dealing with clogs and smells, and more time riding pow or cranking remote work from the dinette. Winter hookups, backcountry boondocking, or long drives between mountains all get easier when your waste routine is dialed and repeatable.


Comments